|
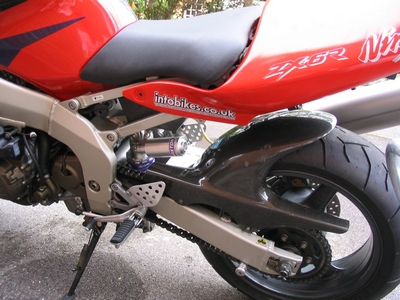
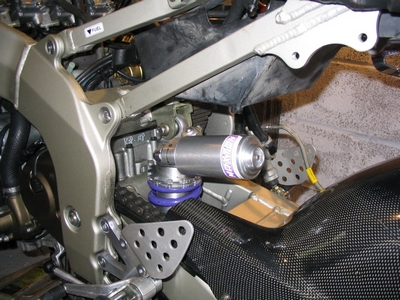
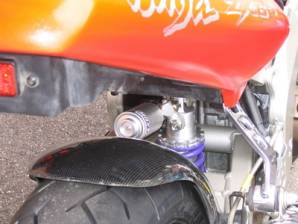
Rear Shock change In the middle
of the conversion of my 199 ZX-6R G2 to a track bike setup I had the fortune
to acquire a Maxton fully adjustable shock which was under a year old for a
very small amount of wonga. This shock is
actually made for the J model ZX-6R with the difference being it is very
slightly shorter as you can see in the pictures below. This did not cause any
problems as the ride height was raised. Below are the
stages of the change over which turned out to be a very simple Job all sorted
in under an hour. At the bottom
of the page, there is an extract from the PB J1 setup, which talks about the
ride height adjustment. |
|
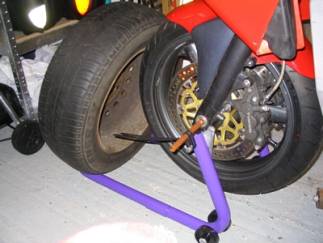
1. After putting the bike on a front and rear paddock stand I placed piece of copper pipe through the spindle to fix the frond end down solidly (with the help of a spare Saab wheel.)
|
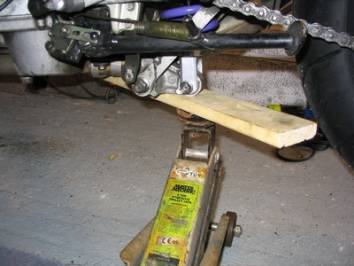
2.
Then
with the help of a trolley jack under the bottom suspension linkage the back of
the bike was raised. With two straps over the beam in the garage
to hold the rear of the bike in the air the jack could be removed and work
could commence. |
|
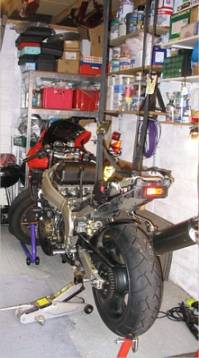
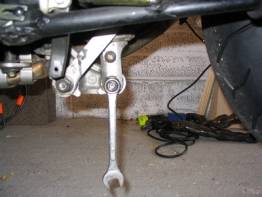
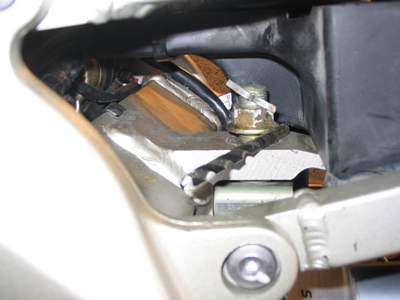
3.
Loosen
then remove the nylock nut on the top of the shock.
|
4.
Loosen
then remove the nylock nut on the bottom of the shock.
|
5.
Remove
the bottom bolt then holding on to the shock remove the top bolt. |
|
|
|
6.
You
should then be able to lower the shock out of its hole in the swinging arm. |
|
|
||
|
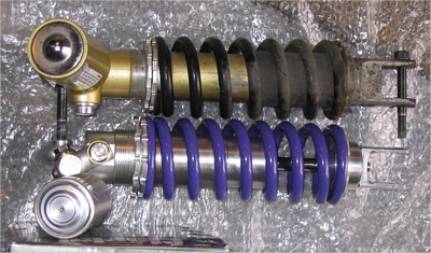
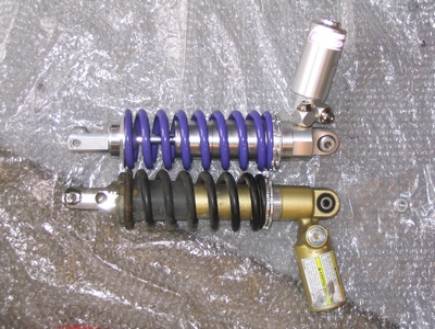
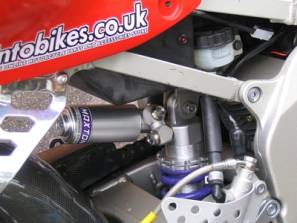
7.
Here
is the old G2 shock alongside the new (ish) Maxton shock. As you can see the
J model shock is slightly shorter. I reckon about 4 to 5 mm by my measurements
|
Looking
at the old shock it’s amazing how much difference having a hugger fitted
makes. 5 years of road crud on the bottom. |
|||
|
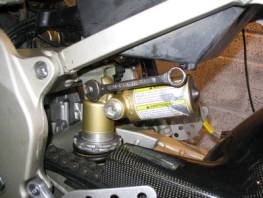
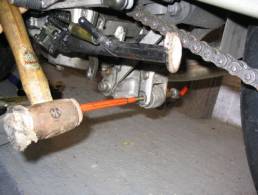
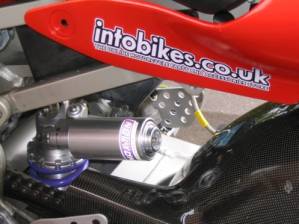
8.
Fitting
the new shock is the reverse of removal. Insert the shock in to the correct
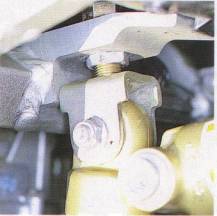
place and fit the top bolt and nut to hold it in position. |
9.
With
use of the trolley jack gradually raise the lower fixing point on the
suspension linkage until it lines up and the bolt can be inserted. 10.
Lower
the trolley jack and fit the nut. 11.
Tighten
up both the upper and lower fixings to the correct Torque. |
|
12.
Then
the ride height was adjusted as described in the PB setup below. As you can see I used a 8mm drill bit to set the distance which should give me 4mm over then normal height allowing for the difference in shock length. 13.
The next
step was to set the sag to the recommended 10mm. Now all I
have to do is go and play on the track |
|
|
|
|
|
|
------------------------------------------------------------------------------------------------------------------------------------------------------------------------------------------------------------------------
Extracts
from the PB Set-up March 2001 Pages 112-113………………………………
|
KAWASAKI
ZX 6R STOCK &
PB SETTINGS |
|
||||
|
STOCK FRONT Preload Kawasaki
quote 14mm showing Rebound 7
clicks out from full in Compression 9
clicks out from full in PB FRONT Preload 4 lines showing Rebound 4 clicks out from full in Compression 6 clicks out from full in |
STOCK
REAR Preload spring
length set at 180mm Rebound ten
clicks out from full in Compression ten
clicks out from full in Ride
height zero
PB REAR Preload one full turn back if weighing less than 14 stone Rebound 7 clicks out
from full in Compression 8 clicks out
from full in Ride height +8mm |
|
|||
|
Every couple
of years, Kawasaki unleash an upgraded version of their 600cc ZX-6R. And it's
always a bike superior to the last one. But, strangely, still not deemed good
enough, or rather fancy enough, to capture that elusive best-seller title.
Not for the want of trying: ZX-6R motors have all been power-houses; chassis
likened to a brick outhouse; and brakes always up to the job. The year 2000
model (J1) is no exception. Raising the
easily accessible rear ride height adjuster by 8mm sharpened the steering by
100%. Where wrestling with the clip-ons and getting off the seat was
necessary to get it on its side, shifting bodyweight would now pitch it over.
This simple adjustment also put more weight over the front end to give
slightly more feel for what the front wheel was doing. Understeer wasn't
mentioned again. Although the
8mm of ride height didn't make the bike unstable, certainly not with Metzeler
MEZ3 Racing tyres, a quick-steering bike is not everyone's cup of tea. To
reduce understeer and only slightly sharpen the steering, just 4mm of ride
height does make a difference. More feedback
came by adding more front preload to take out unwanted sag. Our final setting
was four lines showing, the fourth line level with the top of the fork-top
nut. It was next a case of
slowing fork dive (compression) and the return to full length
(rebound/extension). |
|||||
|
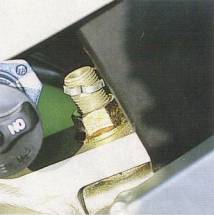
1 Ride height in its standard position. To raise: undo the upper nut
(22mm) until it nears the split pin. Now find a 8mm drill bit and insert... |
2 ……between the underside of the nut and shock mount. Wind the nut down so it's a sliding resistance to get the drill out - like a feeler gauge |
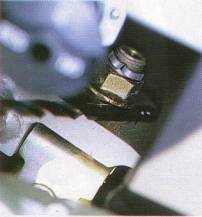
3 Now lift the rear of the bike to take the
weight off the bottom lock nut and wind it up to the underside of the mount
before locking off |
|||
|
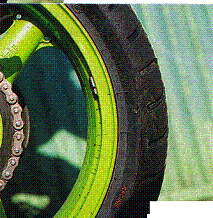
4 Metzeler MEZ3 Racing tyres suit the ZX-6R
very nicely, thank you, Mr CPK. Final pressures at a cold track were: 31
front, 32 rear |
MAXTON
ENGINEERING SPEAKETH: Just for a
change, Kawasaki's ZX-6R rear shock is one that we can revalve. And it needs it.
The shock is underdamped, mainly rebound rather than compression, and the
rear spring is what we would call hard. Because of the shortfall in damping,
and despite the firm spring, the bike tends to ride on the spring. The rear
will squat under power and run wide coming out of turns. We can change
the rear spring for a softer item. The type depends on the weight of the
individual and whether for track or road, or both. Our revalve work (re-shim
and modify damper cartridge)
will give a damping curve similar to our own Maxton shock. But we can't widen
the range of adjustment. You're looking at £123.40 for this conversion. Our
Maxton range of fully adjustable shocks starts at £475.90. The forks
carry too much compression damping - kicking hard off bumps with not enough
rebound. The springs are on the softish side, but not as bad as, say, a
CBR600. To revalve and reshim which will reduce compression and give a
greater range of adjustment, plus suitable springs, will cost £229. CONTACTS: MAXTON ENGINEERING: 01928 740531 |
|||||